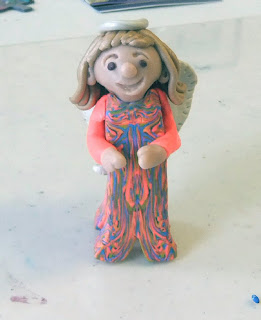
Here are our figures after they were baked long enough to "set" them. From left to right they are the work of Sally, Marlene, Pauline, Mary Ann, and Lilian.
After we took them home we finished the baking...275 degrees for forty-five minutes.
To make them, we started with a stack of long rolls.
We mashed them together and then twisted them.
We folded our twisted roll in half and twisted it again. Lilian told us that it was our option as to the number of times we folded and retwisted.
The next step was to cut off a section of the roll, form that section into a rectangular solid and then cut downward through it once front to back and second from side to side. We then had four equal-sized sections. The sections were then reassembled with the cut edges forming the outward sides.
Here is a photo of three steps, the rolls before twisting, the twisted roll and the reassembled rectangle.
The most difficult part for me was reassembling the rectangular block after slicing it. I found these excellent directions yesterday when I typed "making a natasha bead from polymer clay" into our search engine.
www.polymerclaycentral.com/poleigh/natasha.html
Here is Sally's angel in process. You can see her twisted roll behind the figure.
Here is Mary Ann's angel in process. You can see the end of the stack of rolls she started with. She has attached arms and is deciding on the right size for the head.
The first photo below is Marlene's angel in process. The second photo is her finished angel before the baking to set it so she could take it home for the final baking. We made the hair by using a clay extruder.


Oh they are really cute! They would make wonderful ornaments!! :)
ReplyDelete